Top 4 Protective Finishes You Can Add to Your Printed Pages
November 4th, 2023
7 min read
Once you’ve completed your print design and decided on how your project should look and feel, you’re ready to think about whether you want a finishing coat on the pages of your catalog, pamphlet, flyer or other printed piece. So how do you decide on the right finishing coat — or whether or not you even want one?
In this article, we’re going to discuss the four protective finishes available for ink on paper copies to help you determine which one is the right fit for your needs. We’ve been helping clients small and large get the right look and feel for their printed products through paper, finish and embellishment choices since 2005, and we believe we can do the same for you.
Whether you choose to work with Integra, select a different printer or take a DIY route with an online printer, you should be better equipped to get the perfect finish for your next project after reading this piece. You’ll also learn:
- How to determine whether you want to add a finish to your paper in the first place
- Where each finish is a good fit
- Where each finish is a bad fit
- How a post-print finish affects the look and feel of each paper selection
So, without further ado, let’s dive in and ensure you know how to make the choices that will give your work the appearance, tactile feel, paper weight (thickness) and durability it deserves.
Should I Add a Finishing Coat to My Printed Work?
Before you learn about types of finishes, you should make sure you want to add a finish in the first place. It’s not a mandatory step, and lots of projects hold up just fine without it. Consider the following factors as you make your decision:
- Know your product’s purpose: If you’re creating printed copies that will undergo lots of wear and tear, a finish is a great option that will help increase the longevity of each piece. For instance, flyers that will be hung outside and should be readable and appealing for a moderate period of time should certainly have a finish — and probably a thick one. On the other hand, if you expect your pamphlet to be read once and then tossed, you may be able to forgo the finish to save both time and money.
- Reflect on your paper type: You may have already chosen a specific paper type with a certain level of coating. If you haven’t, then maybe you’re making the finishing decision at the same time as your paper type decision, which is a great strategy. Either way, make sure you know how a finishing coat would alter the aesthetic you’re hoping to achieve. For instance, you wouldn’t want to pay a premium for uncoated paper that makes ink and color pop only to turn around and finish it with a thick coating that diminishes that artistic value. Always remember: If you do add a finishing coat, it’s the factor that will determine your project's gloss level.
- Consider your budget: Generally speaking, the four finishing types we list below show up in order of average cost, from lowest to highest. That said, they also go from least protective to most protective. We say “generally speaking” because these factors can vary depending on your print provider’s equipment and expertise, which we’ll cover next.
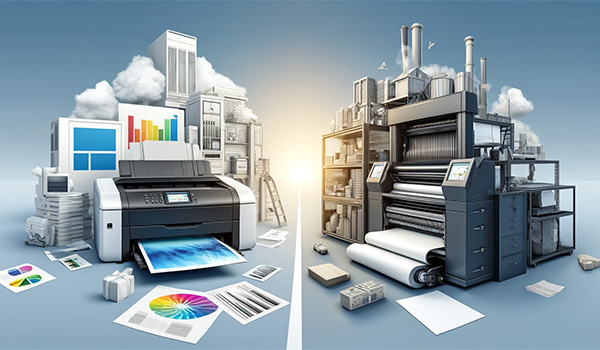
- Check into your printer’s specialties: Depending on the type of print business you’re working with on your project, you may want to check into their capabilities. The type of equipment they have can make a big difference in pricing. Lamination is almost always the most expensive of the four finishing options, for instance, but a book publisher might be able to keep your prices lower if you’re laminating a book cover because the process is built into their streamlined work.
- Distinguish between spot and flood finishes: If you’re looking to protect your printed pages, flood lamination is your path there. If you want more of an aesthetic pop, spot finishes will distinguish a portion or portions of your work with a different texture and appearance. Spot applications fall more under the category of paper embellishments than protective finishes, but you’ll need to know your preferences for both.
1. Varnish Liquid Paper Finish
Varnish was the original coating before any of the others came along, used to add a protective layer on top of paper and ink to keep the ink from fading and protect the pages.
Varnish can be applied as a wet trap, which happens inline at the same time that inks are being laid down. This option costs less because it doesn’t take a second pass to put finish on the pages.
For better contrast, you can choose dry trap varnish, which costs more because it requires another run through the press after the original print process. Since the wet ink and wet varnish won't meld together (because the ink has had a chance to dry), you’ll notice better contrast between the ink and the protective coating. In most cases, print buyers choose dry trap varnish when they want an embellishment to stand out, but you’ll also notice that a dry trap gives you a higher gloss finish if you’ve chosen flood gloss varnish.
With both wet and dry trap procedures, you can choose varnish in the following styles:
- Gloss
- Semi-gloss
- Satin
- Matte
You can also select two-way varnish if you want to add embellishments with high contrast. In this process, dull and gloss varnish are applied together, typically with flood gloss and spot dull. Two-way varnish is achieved via a dry trap procedure, so the required second run will cost extra.
2. Aqueous Liquid Paper Finish
Aqueous liquid paper finish is a little harder than varnish and a bit thicker. It offers a better, more protective coating as a result. You can achieve a higher gloss level with aqueous instead of varnish, if gloss is your preferred aesthetic, which makes it great for magazine covers, catalog covers and any other materials you want to give a longer life without full lamination.
This finish can only be applied as a flood coating that covers the entire page, so it’s not a great solution for projects you want to add embellishments to. Furthermore, it’s always done in-line and never as a second pass. It’s become more industry-standard over the years than varnish, mostly because it’s easier for printers to manage.
This finish is available as:
- Gloss
- Semi-gloss
- Satin
- Matte
- Soft touch
Some inside industry knowledge about the way aqueous finish is maintained and applied should help you understand when you can and cannot get the coating on your pages, and why. Some printers don’t offer aqueous coating because the press in use has to have an aqueous tower with aqueous finishing capabilities. If your printer doesn’t have access to this equipment, you’ll have to either look elsewhere or settle for one of the other finishes.
That being said, aqueous is easier to apply for those who do have a press manufactured to offer it, because the tower for aqueous solution is dedicated to that and only that liquid. It’s simply flipped on or off, as opposed to varnish, which requires the extra tower — sometimes used for Pantone and metallic inks — to be prepped with varnish and then cleaned out after the job is complete.
So while aqueous solution itself tends to cost more than varnish, you might find that your printer offers lower prices regardless thanks to an easier, quicker, more streamlined procedure.
3. UV Liquid Paper Finish
The third most protective paper finish, and the most protective of the liquid solutions, is UV coating. It also offers the highest gloss level for gloss finishes.
UV finishes are available in spot and flood applications, but spot UV is highly specialized and unavailable with many printers. Flood UV can be applied inline, but printers with these specialized capabilities and presses generally work with magazine, catalog and/or book covers exclusively.
The norm is that UV finish is typically applied offline with a second pass on a separate machine specially designed for laying liquid UV coatings. If you have a direct mail piece you want to make stand out to your recipients and have a nice protective coating, you might want to consider this option in any of the following styles:
- Gloss
- Semi-gloss
- Satin
- Matte
- Soft Touch
As far as cost goes, the typical offline UV will cost a similar amount as a second pass with varnish, plus a boost in cost for higher protection and extra material. UV coatings are the thickest, and they require setup for the second pass. They also have more intensive regulations to follow for OSHA standards. All of these factors contribute to pricing.
4. Full Lamination
This category is a little different from the others because it’s an actual sheet of lamination added to each page. If you’ve interacted with many paperback books, you’ve probably noticed the fine film on the front and back covers — that would be full lamination. It never happens inline.
Film lamination offers the highest level of protection. It has an outstanding performance on paperback books that people want to keep on their shelves and read again and again.
Another great use of film lamination is on projects that will be outside in the elements for a period of time. If that period is an extended or indefinite one, you’ll probably want to look into exterior signage. But if you have a poster or similar piece you want to hang outside for a couple of weeks, film lamination will do you proud. It even has a level of UV protection built in, so you won’t have to worry about quick fading in the sun.
This finish usually costs the most on anything but books — an exception because book printers usually have it built into their streamlined process. It offers the greatest protection a finish can, however, and you’ll have an opportunity to choose its thickness. This finish comes in:
- Gloss
- Semi-gloss
- Satin
- Matte
- Soft Touch
Note: Film lamination can be flush cut or sealed. Flush cut is trimmed at the same edge of the paper, takes less time for the printer and costs less as a result. Sealed lamination costs more because the material is brought past the edge of the pages and sealed to offer maximal weather protection.
What Type of Paper Finish Sounds Like Your Best Fit?
If you’d already started planning your project by the time you came across this blog post, you may have found yourself wondering how to achieve the look, feel and protection you needed for a successful final product. We know it can be overwhelming to see a list of finishes that can be applied to each page after the paper itself has already been selected, and that alone comes with its own range of industry terminology related to the level of coating each sheet has.
So, in short, we get it. The options are plenty, the lingo is cumbersome and at the end of the day, you no doubt want to trust that the copies ending up in your hands or your customers’ hands will look good and feel right. But you probably want to do it without needing a degree in printer-speak and paper types.
We’ve tried our level best to differentiate each type of paper finish and lay out the pros, cons and appropriate use cases for each. Now that you know the most important factors associated with each paper finish, you may decide you want to take a closer look at paper types, especially if you’ve chosen to forgo finish.
Have you already selected your paper type, finish and embellishments and want to get started on your project?
At Integra Graphics Synergy, we follow a print management model that entails connecting with a wide range of experienced vendors and print houses. As a result, we can help you find whatever paper type you’ve decided to go with, no matter the finish or embellishments. Click below to start your project!
Topics:


